Usage
Creating your first project
Before using the app, first prepare a folder on your computer containing the photos you want to use. When a project is created, the app will automatically import all photos (JPG/JPEG or PNG) in the folder it is created in.
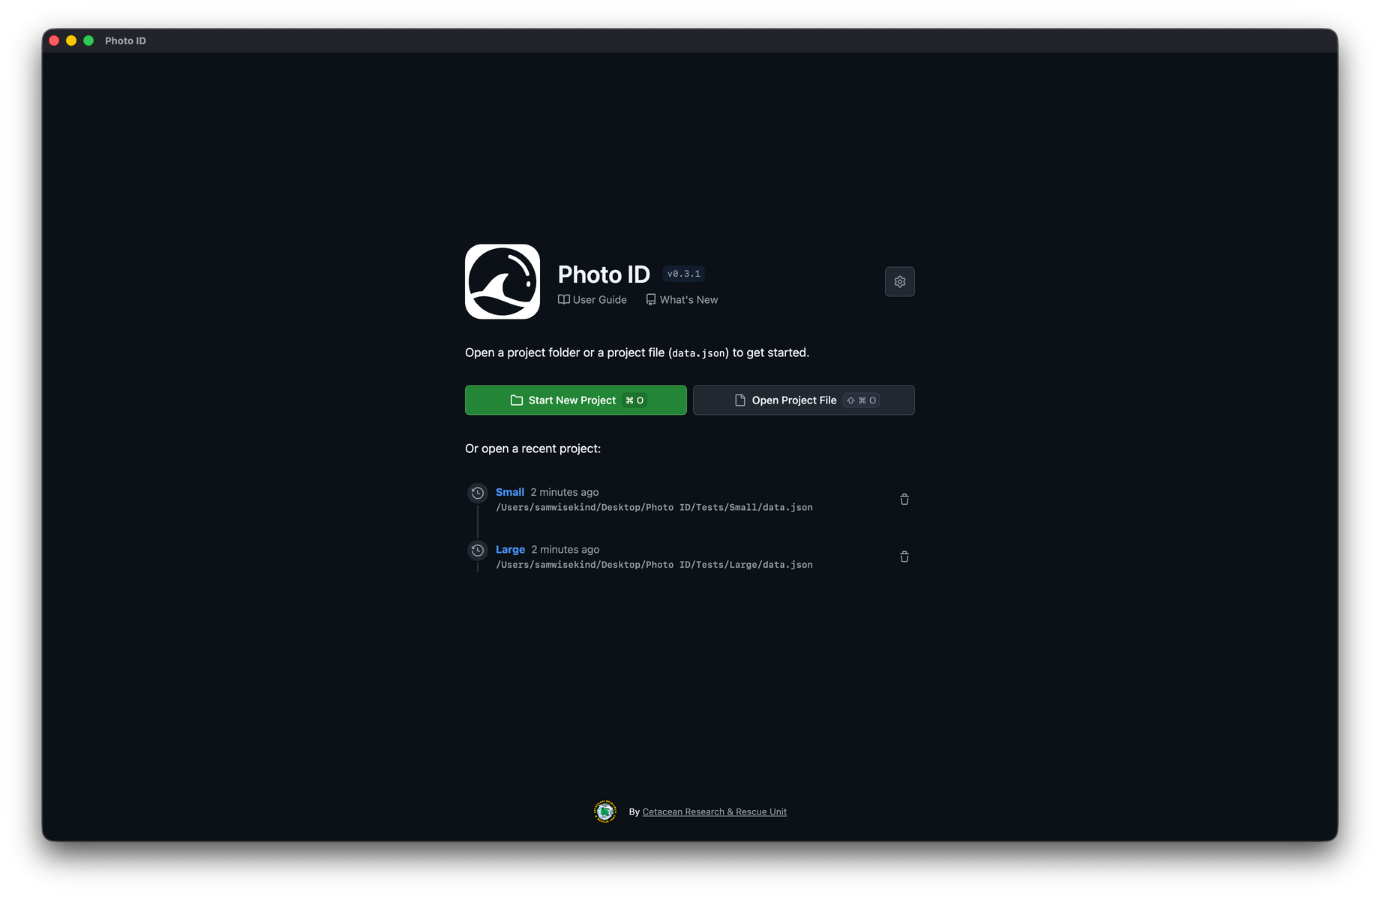
When you first open the app you will see the home screen. To start a new project, select Start New Project. Choose the folder you want to create a project in and the app will begin to initialize the project.
Once the project has been created, you may notice two files have been added in the folder you selected:
project.photoid- project data (don't edit this manually!)thumbnails/- folder containing thumbnails for the photos used in the project
Note
You cannot add or remove photos from a project after creation, and the app does not support sub-folders. This may change in the future.
The project can be opened again on the home screen from either the recent projects list or by selecting Open Project File and selecting the project.photoid file in your project folder. You can also double-click a .photoid file to open it directly in the app.
Tip
On Windows you will need to right-click a .photoid file, select "Open with" then "Choose another app", select the Photo ID App and click "Always".
Projects can be removed from the recent projects list by selecting the button with the bin icon. Note that this does not remove the project file, thumbnails, or any exported photos from the project folder.
Sorting and matching photos
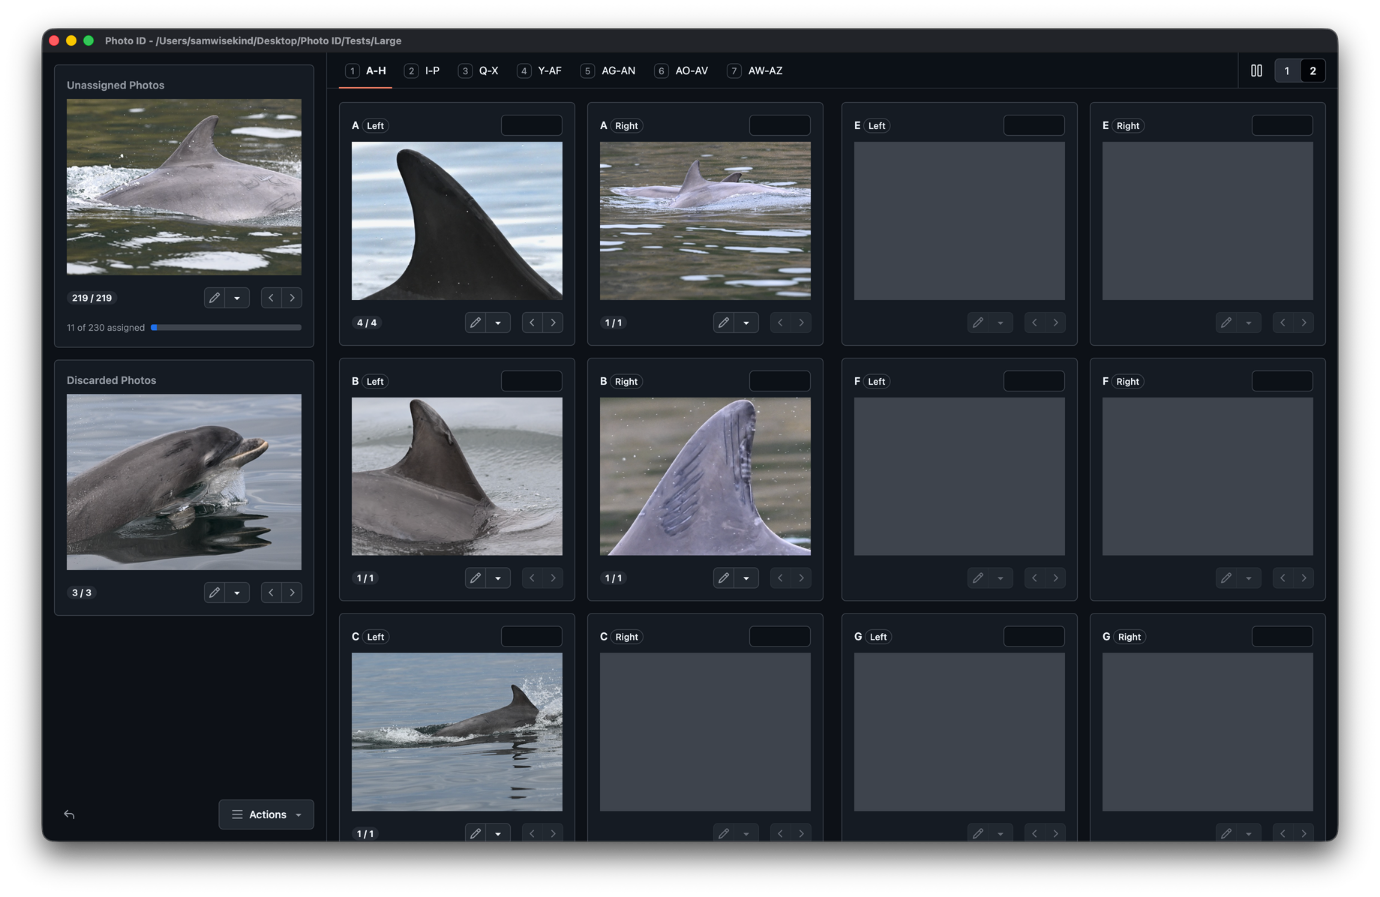
Once you have created a project or opened an existing one, you will see the project screen. Here you can start to sort and match photos. This can be done by clicking and dragging a photo from one 'stack' onto another, which will move it from the original stack onto the targeted one. The targeted stack will be highlighted when dragging a photo over it.
A stack is a collection of photos, and can contain any amount of photos - the arrow buttons in the bottom-right can be used to navigate between photos in that stack. An indicator on the bottom-left shows the total number of photos in a stack and which photo is currently displayed.
There are three stacks in the project view:
Stacks
Unassigned
When creating a new project, all photos are automatically assigned to the 'unassigned' stack. A progress bar below this stack shows how many photos have yet to be assigned.
Discarded
Below the unassigned stack is the 'discarded' stack. This is for photos that are not usable (such as poor photo quality) and are not intended to be used in the project.
Matches
In the main area of the screen there are several pairs of 'matched' stacks, grouped by one stack for each side of the animal (left and right).
When exporting photos (see exporting) the letter in the matched stacks is used when generating file names, such as AL, AR, BL, BR, etc. These can be overridden by using the custom ID text field for each stack, which will be used in place of the letter. For example, entering 001 into the text field in the AL stack will result in the photo being exported as 001L instead of AL.
By default there are eight pairs of matched stacks per page. Pages can be navigated by clicking the tabs on the top of the page, or by using the number keys indicated next to the page name.
On the top-right of the page there is a toggle for viewing matched stacks by two or one columns.
Note
There is a set total of 52 matched stacks which cannot be increased or decreased. This will change in the future.
Duplication
Photos can be duplicated by holding the Ctrl/Cmd key while dragging-and-dropping. The photo will be duplicated onto the target stack, with the original remaining where it was dragged from. Edits and other changes made to the duplicated photo are not reflected onto the original.
Exporting
Once photos have been sorted and matched, these matches can be exported by opening the Actions menu in the bottom-left and selecting Export matches.
Exporting a project creates a new folder matched/ in the project folder which contains all photos that were placed in matched stacks. The stack letter (or custom ID) are appended to the original file name. For example, if a photo with the name photo_1.jpg was added to the AL stack, it will be exported as AL_photo_1.jpg.
Edits made to photos (see edits) are applied to the exported photos. Edits can also be reverted by opening the drop-down menu and selecting Revert to original.
Only photos in matched stacks are exported - photos in the unassigned or discarded stack are not used in the export. Once finished exporting, the exported folder will automatically open.
Warning
Exporting photos will overwrite any previously exported photos, so any previous exported photos may be lost.
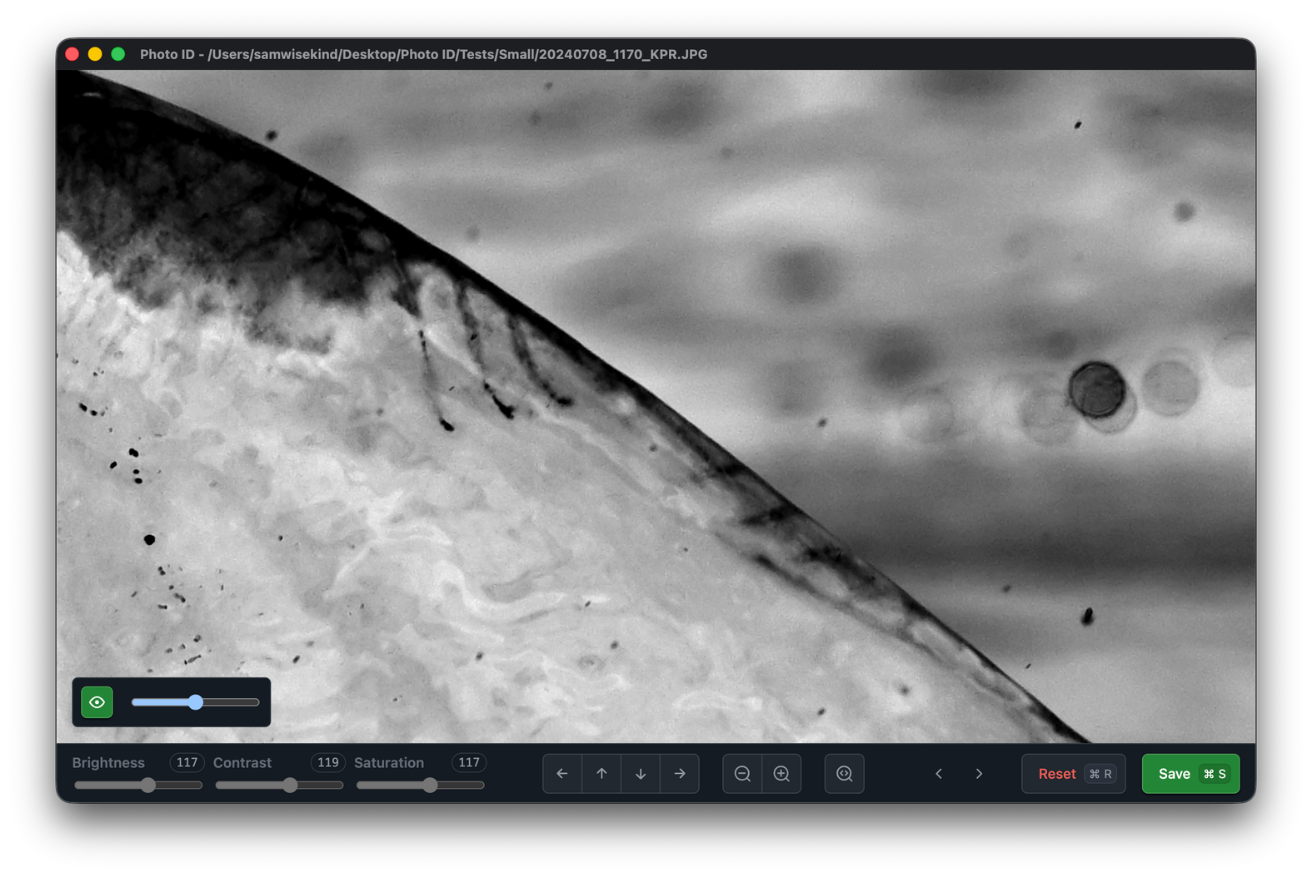
Editing photos
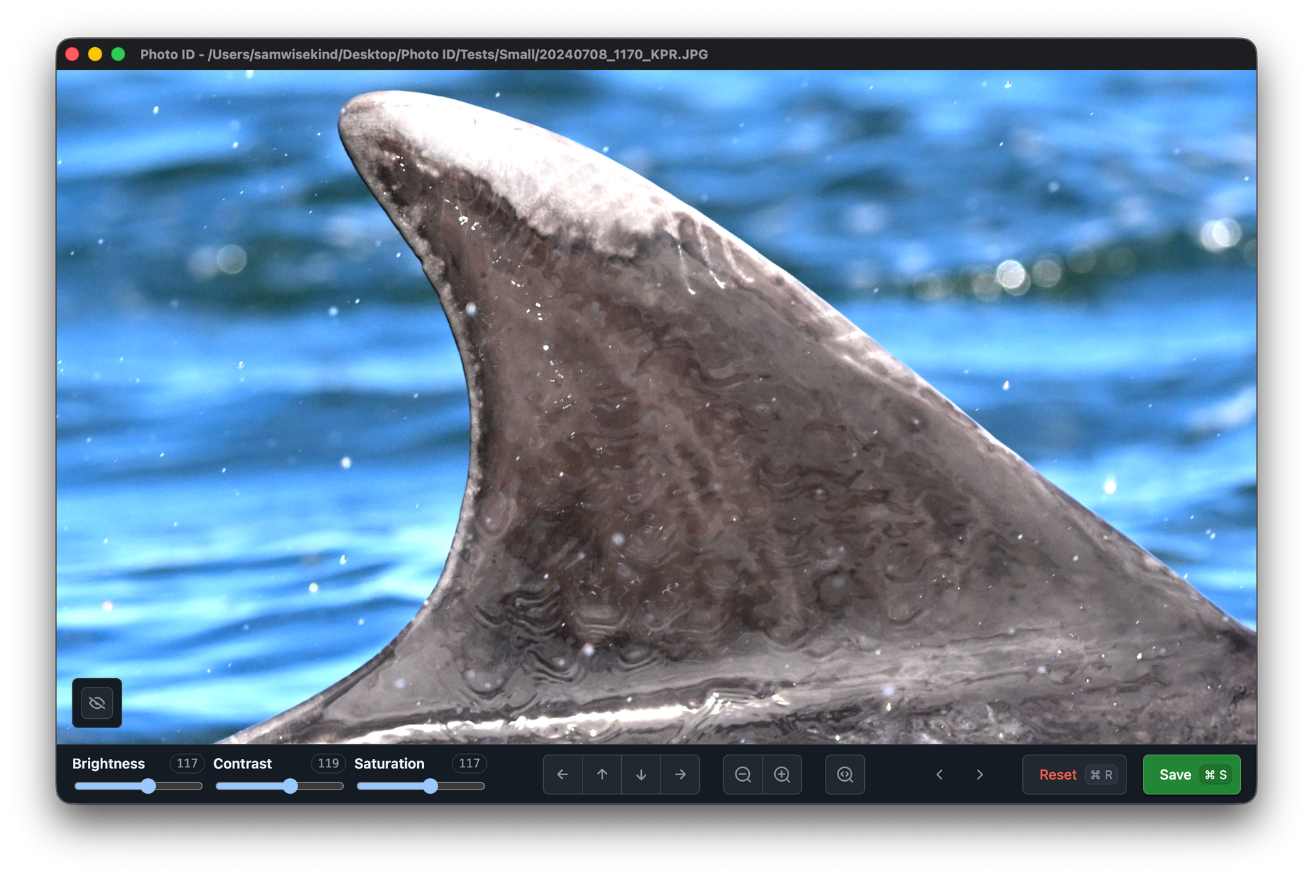
Photos can be edited to help identify marks. The photo editor can be opened by selecting the Edit Photo button below the photo in the project screen or by double-clicking the photo. The photo editor will open in a new window.
There are several options that can be used to edit photos in the toolbar on the bottom of the screen:
- Brightness, contrast, and saturation can be controlled with the sliders in the left of the toolbar
- Zooming can be done by using the mousewheel on the photo (or the buttons in the toolbar)
- Panning can be done by clicking and dragging the photo (or the buttons in the toolbar)
- Cropping is based on the zoom and pan of the photo - what you see in the photo editor is how the photo will be cropped
Note
Original photos in your project are NEVER edited or modified in any way. Edits made to photos are only visible in the app and are used when generating matched images when exporting a project.
Edits to a photo can be saved using the Save button. Edits can be reset back to their defaults by using the Reset button. Closing the editor window without saving changes will be discarded. Opening a photo that has been previously edited will restore the original edit values.
You can load the previous or next photo in the stack the current photo is in using the arrow buttons. Moving the current photo to a different stack while it is open in an editor screen will load the previous and next photos in the new stack once clicked.
Multiple photo editor windows can be open at the same time so you can compare photos side-by-side.
Loupe
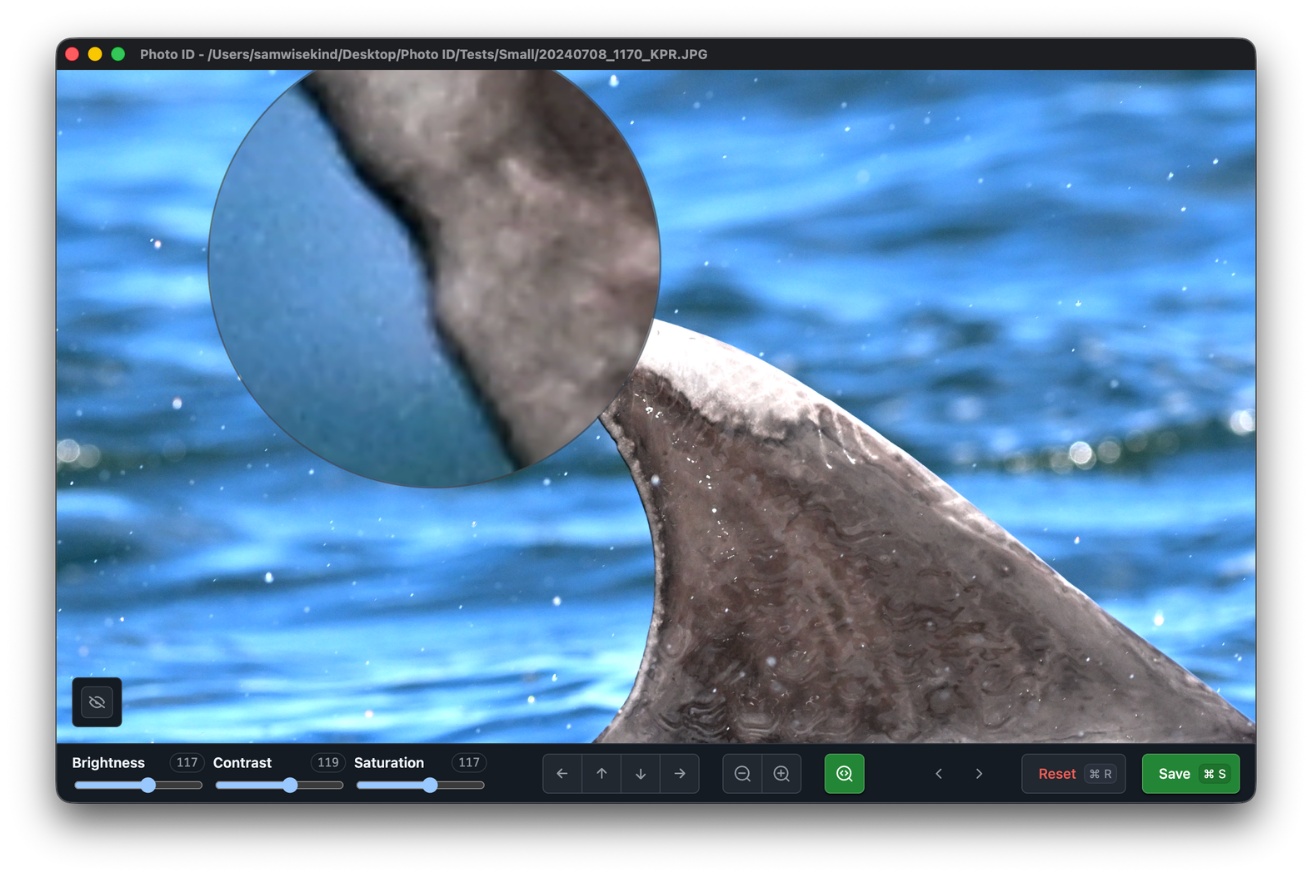
A loupe can be toggled using the loupe toggle button in the toolbar. It will follow your cursor and allow you to see more details in the photo without having to zoom in and out.
Edge detection
Edge detection can be enabled to more easily identify marks in photos.
This can be toggled by selecting the Toggle Edge Detection button on the bottom-left of the screen above the toolbar. When enabled, a slider will appear that can be used to adjust the intensity of the filter.
Note that the edge detection filter is not used when saving or exporting images, and is purely used as a temporary filter.
Saving
Projects are auto-saved whenever changes are made in the project or photo editor screens.
Settings
The settings menu can be opened selecting the Settings button on the home page, using the keyboard shortcut, or by using the menu bar option.
These settings are global (i.e. the same for all projects) and per-user on your system.
For information on how we handle data and optional telemetry, see our privacy policy.
Notes
Original photos are never modified in any way, and every effort has been made to be sure the app never unintentionally affects your original photos. However, please ensure you always have backups of your original photos regardless!